
Page 66 - ODV Training outline_EN
P. 66
and other secondary parameters (this phase can also be
encompassed in choosing a pre-set print profile).
• Allow the software to perform slicing and export the resulting file (.gcode
or similar).
• Transmit the file to the printer via Wi-Fi or through physical storage media
(USB drive, memory card).
• Start the printing process.
• After printing, remove any supports or proceed with finishing touches if
necessary.
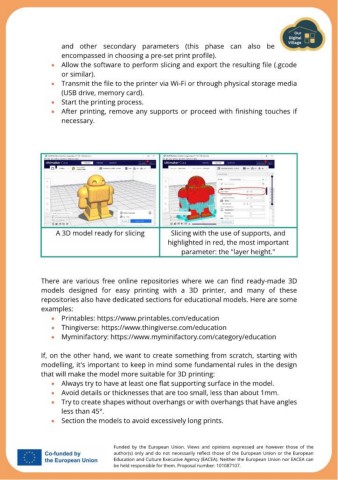
A 3D model ready for slicing Slicing with the use of supports, and
highlighted in red, the most important
parameter: the "layer height."
There are various free online repositories where we can find ready-made 3D
models designed for easy printing with a 3D printer, and many of these
repositories also have dedicated sections for educational models. Here are some
examples:
• Printables: https://www.printables.com/education
• Thingiverse: https://www.thingiverse.com/education
• Myminifactory: https://www.myminifactory.com/category/education
If, on the other hand, we want to create something from scratch, starting with
modelling, it's important to keep in mind some fundamental rules in the design
that will make the model more suitable for 3D printing:
• Always try to have at least one flat supporting surface in the model.
• Avoid details or thicknesses that are too small, less than about 1mm.
• Try to create shapes without overhangs or with overhangs that have angles
less than 45°.
• Section the models to avoid excessively long prints.
Funded by the European Union. Views and opinions expressed are however those of the
author(s) only and do not necessarily reflect those of the European Union or the European
Education and Culture Executive Agency (EACEA). Neither the European Union nor EACEA can
be held responsible for them. Proposal number: 101087107.
